Setting Up A Recording Session In Audacity
For Mac users

Naava
Last Update 3 jaar geleden
- Open Audacity.
- Make sure your session specs on the bottom of the Audacity window match the requirements.
- The project rate should be 44100

Caption: Bottom of Audacity screen
- When you create a track (make sure it's mono), double-check the track settings.
- To the right of the track name, click the down arrow and navigate to 'Format' -> click '24-bit'
- To the right of the track name, click the down arrow and navigate to 'Rate' -> click 44100 Hz
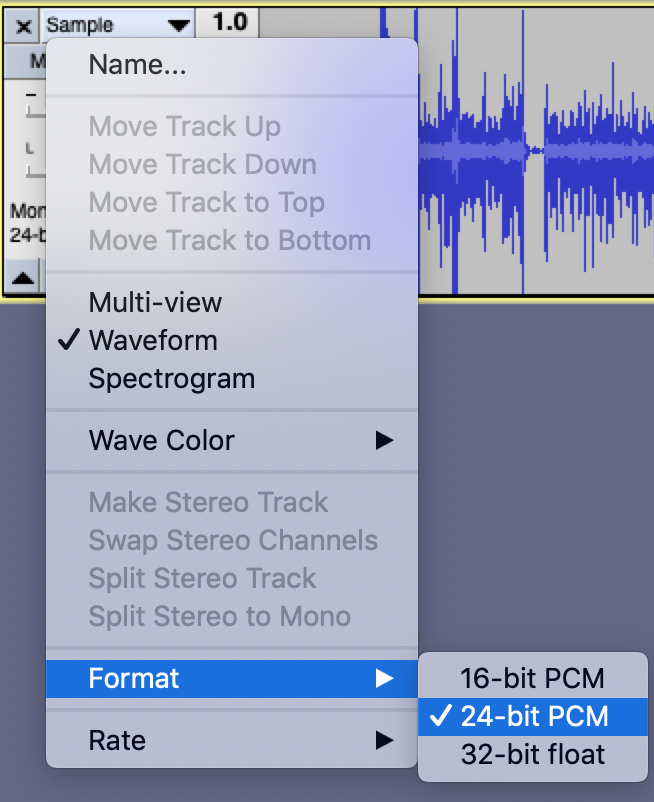
Caption: Menu selecting 24 bit in Audacity
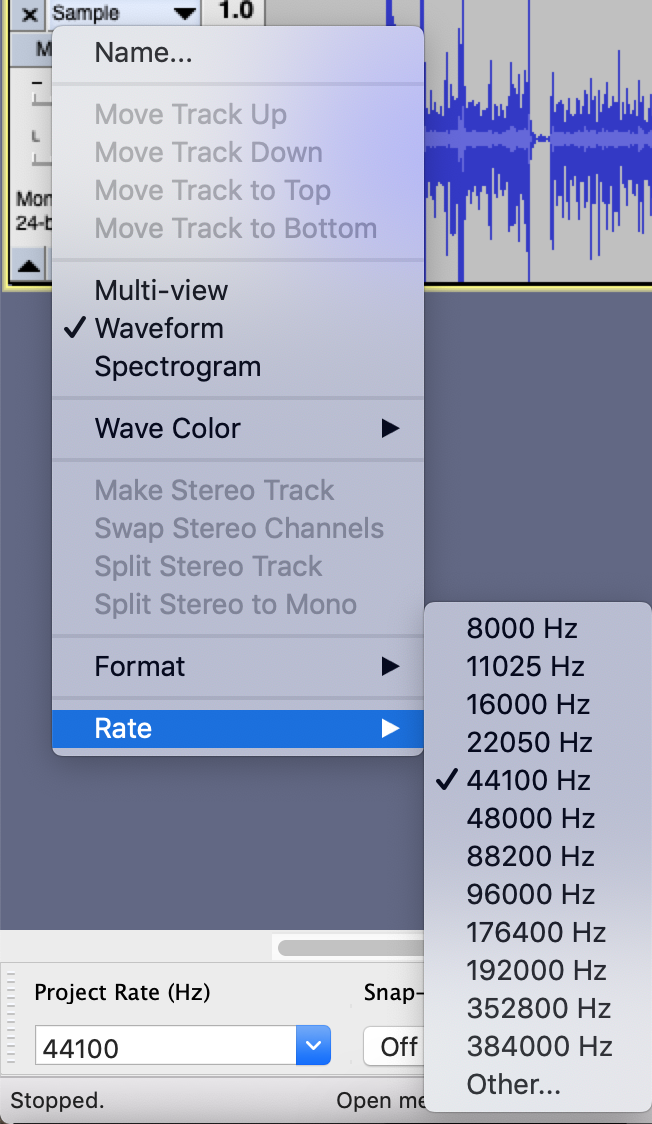
Caption: Menu selecting 44100 Hz in Audacity
- Check above the track window that your mic is selected as the input device.
- The input should be set to your microphone; input 1 or 2 depending on where the mic is plugged in on your interface.
- The output should be set to your headphones or speakers.
- Record a mono track for VO and Audiobooks.

Caption: Input and Output options in Audacity
- You can also find the input and output options in the Preferences menu by navigating to 'Audacity' -> 'Preferences' -> 'Device'
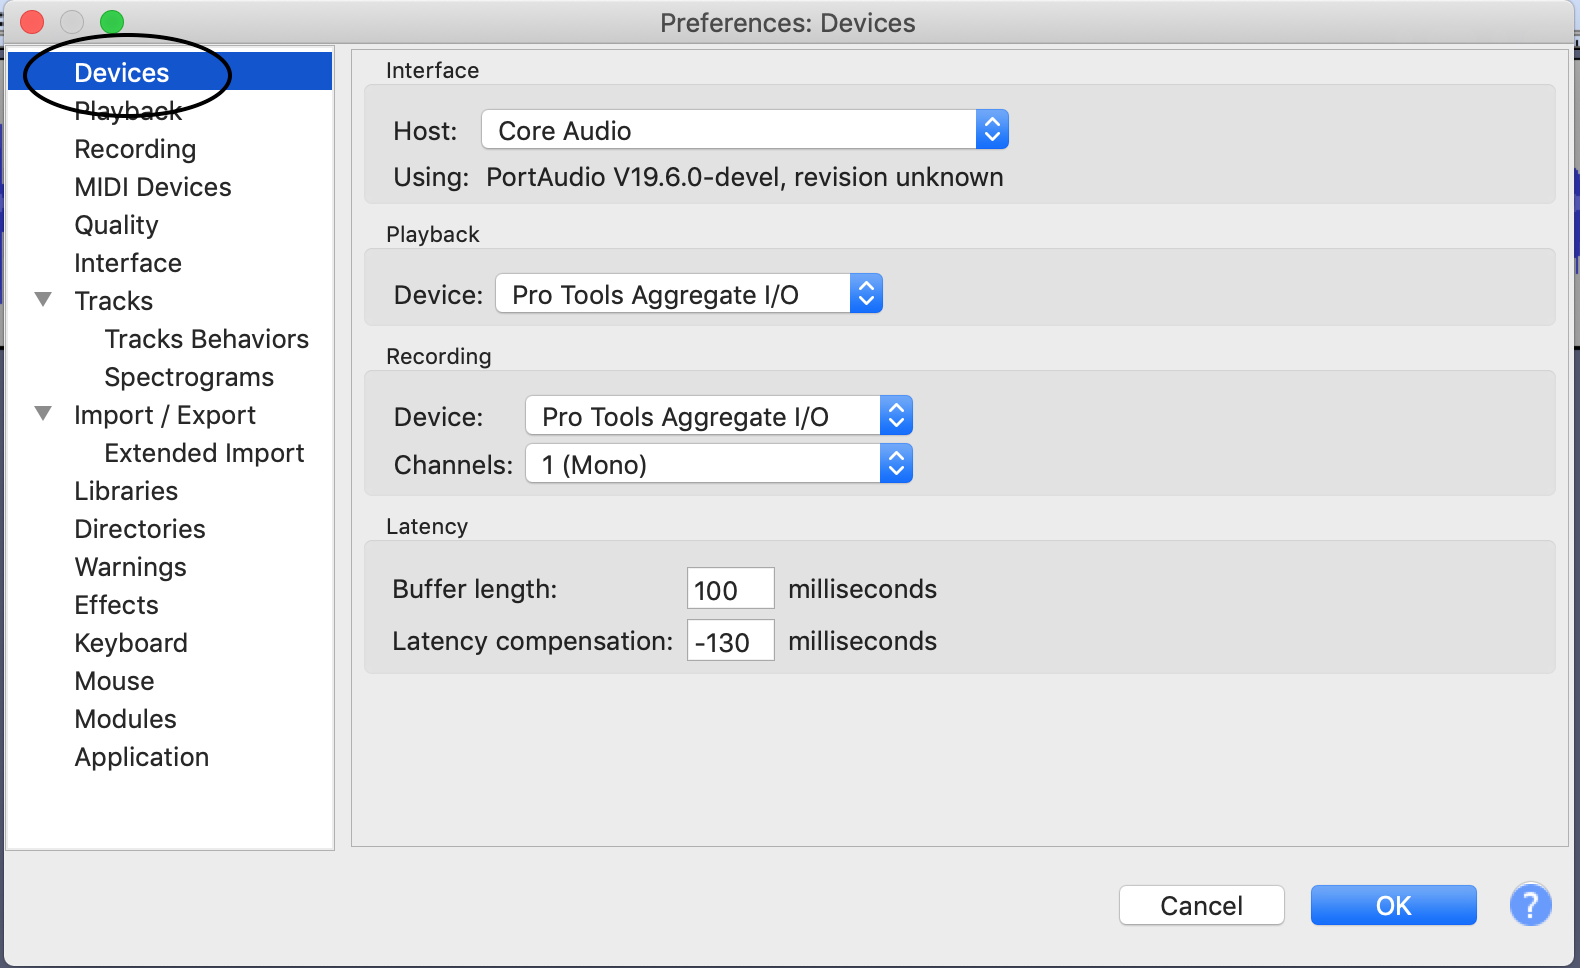
Caption: Audacity Preferences menu
- Set the pre-and post-roll by navigating to 'Audacity' -> 'Preferences' -> 'Recording'
- Choose the amount of pre-roll you want. The default is 5 seconds.
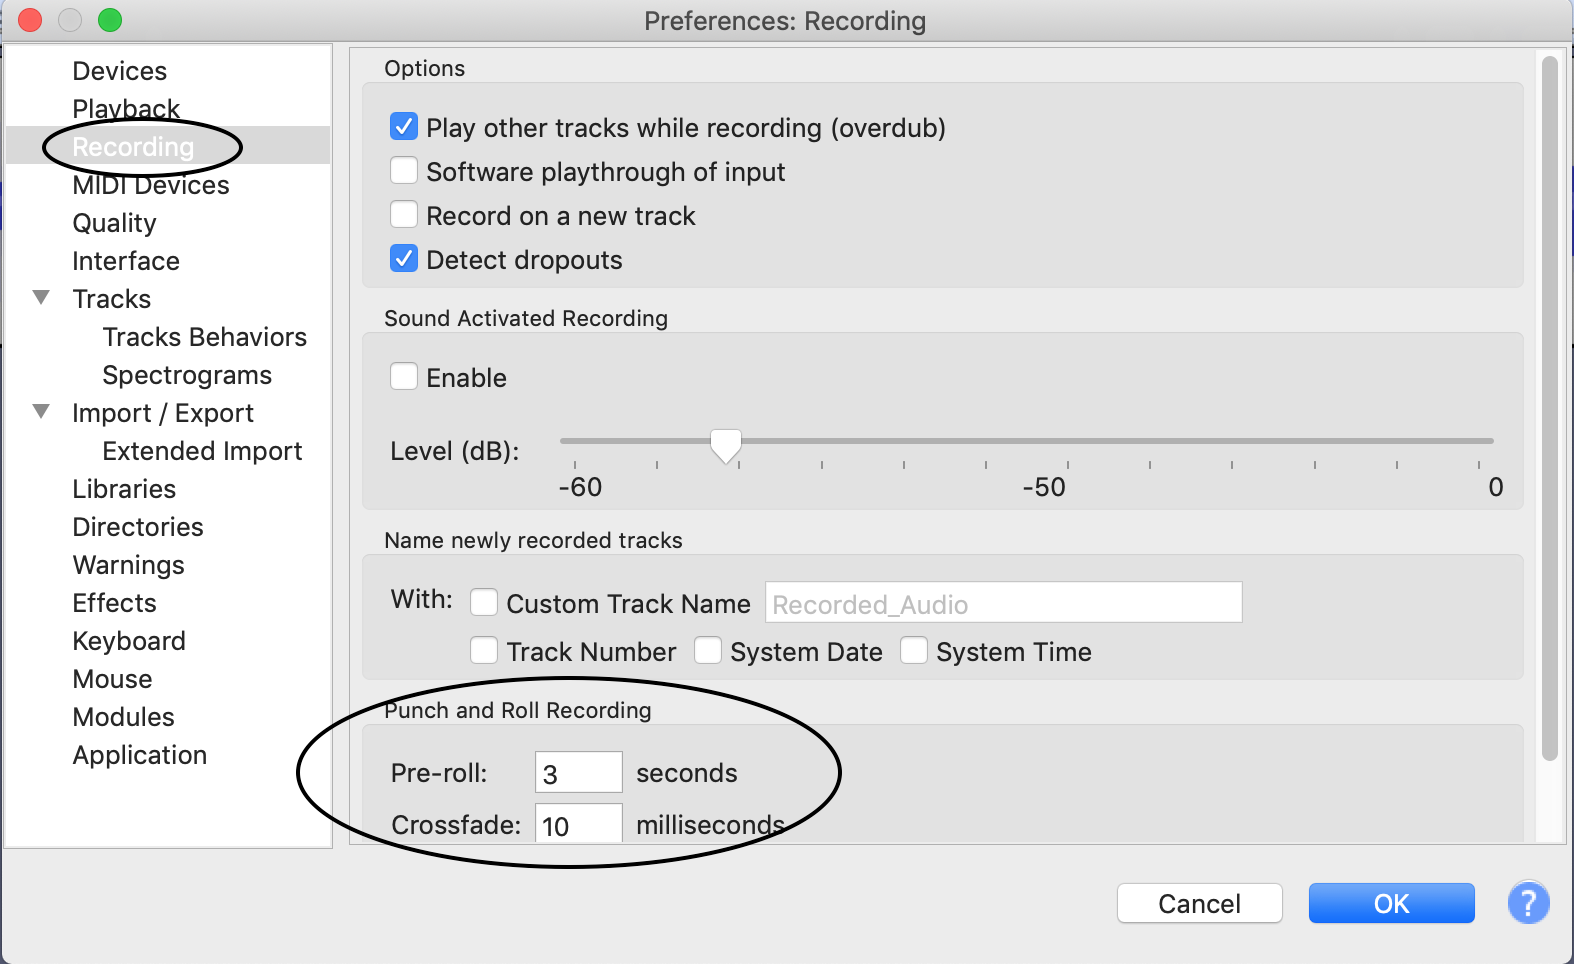
Caption: Audacity preferences menu
- Ensure Punch and Roll Record is enabled by navigating to 'Transport' -> 'Recording' -> 'Punch and Roll Record'
- You can also use the shortcut 'shift + D'
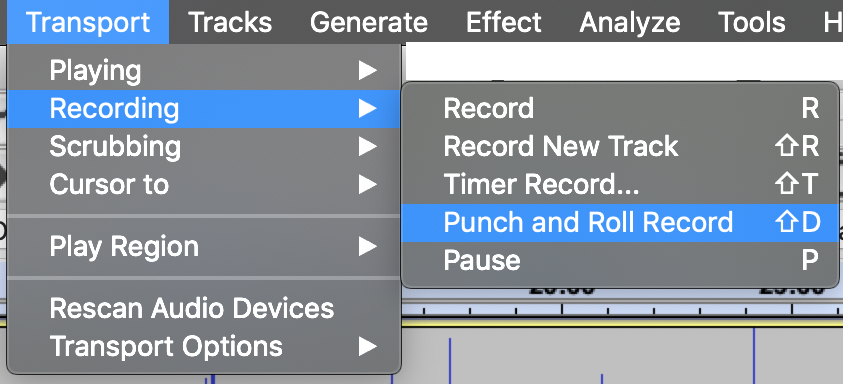
Caption: Enable Punch and Roll Record in Audacity
- Record ‘arm’ your track by clicking the red record button.
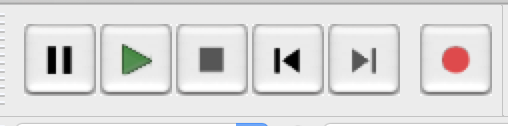
Caption: Pause, play, stop, rewind, fast forward, and record buttons
- Start recording.
- Audacity is a destructive DAW.
- This means if you record over any audio, the audio you recorded over is now gone. Remember to constantly back up and save your session.
- Audacity does NOT auto backup. Keep this in mind and always save copies!
- Listen through your files to ensure you did not cut off any breaths or words.
- Re-record these lines if needed.
- Export your audio as .wav or .mp3
- Go to 'File' -> Select 'Export' -> 'Export as wav' or 'Export as .mp3'
- Choose the export settings that match the specs you were given.
- Export at 44100 Hz/24-bit
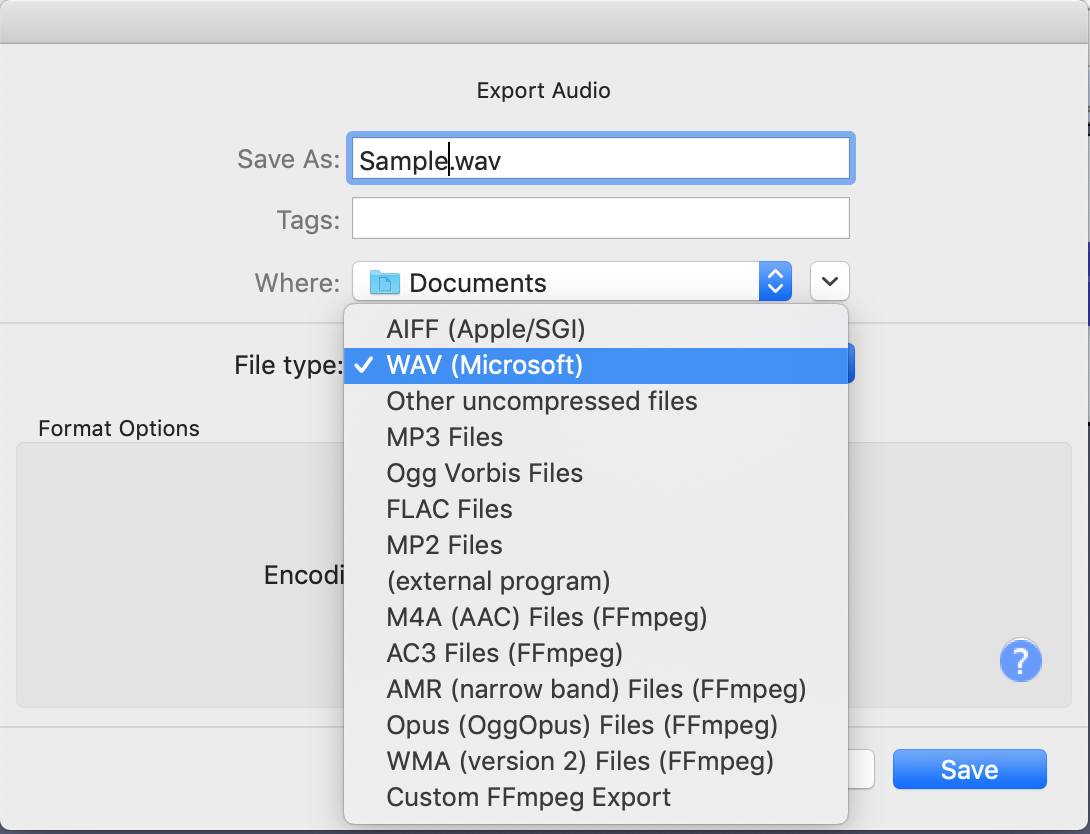
Caption: Export menu in Audacity
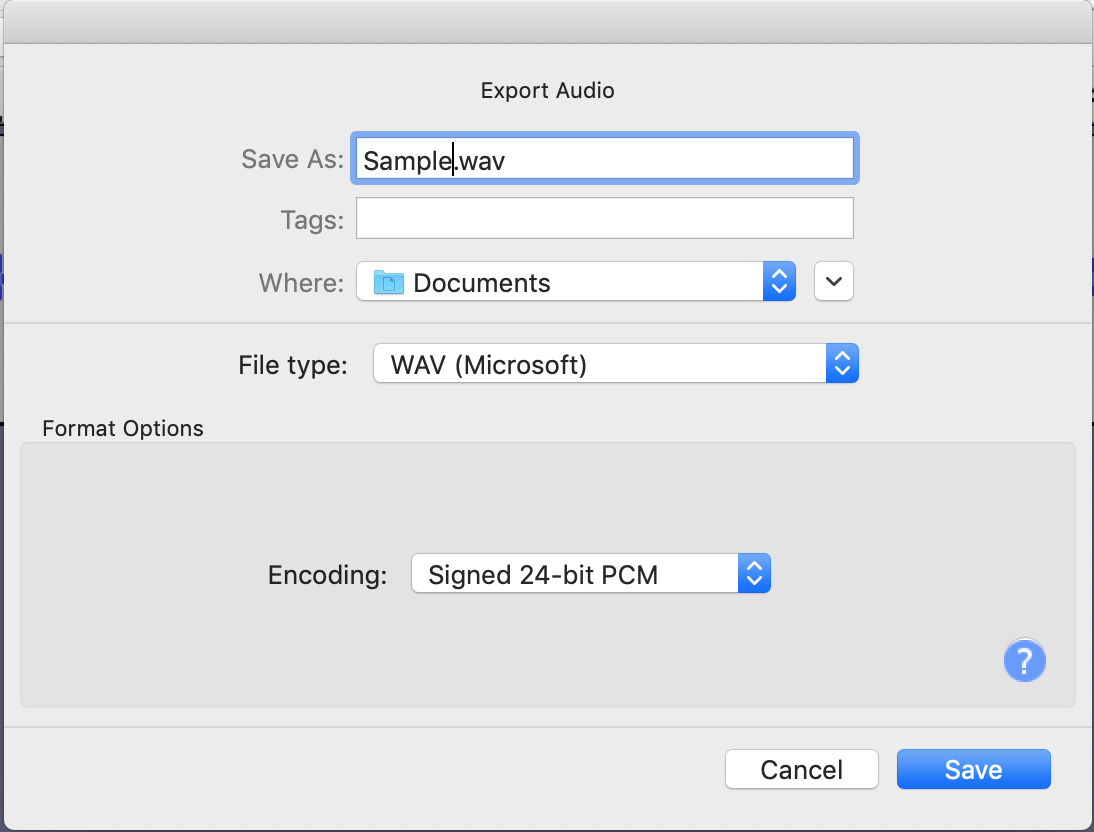
Caption: Export menu in Audacity